Documentation > Manuals
|
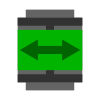
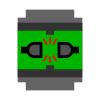
Decoupler - 2.04.017
Introduction
The decoupler is designed to decoupler the cars of LEGO® trains.
This manual explains the specifics of the train decouplers. It assumes you have a basic understanding of nControl and 4DBrix™ controllers.
If that's not the case, it's advisable to first go to the Getting Started guides and aquited with our automation system.
 Features
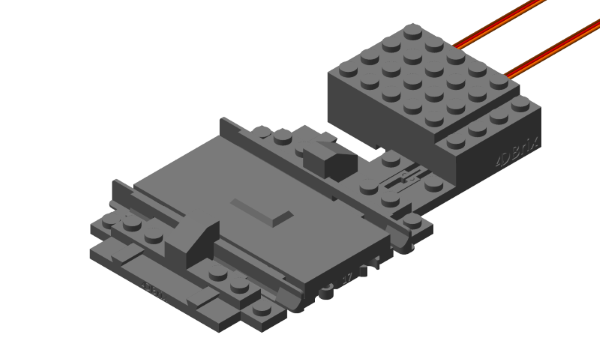
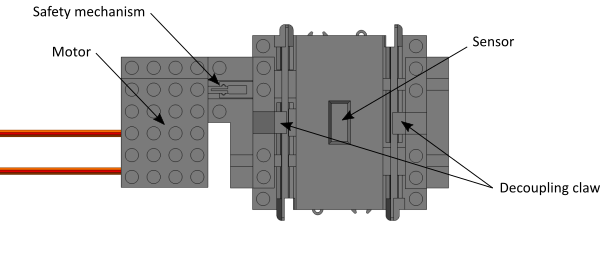
The decoupler works by blocking the wheel of the train cars with a claw. The claw is actuated by an integrated servo motor.
The decoupler also has a sensor that can detect the magnets of the train couplings.
This allows you verify that the cars are positioned correctly and there wheels will not block the claw when you close the decoupler, even if you cannot see the decoupler.
There is a mechanical safefty to protect the motor in case the train wheels block the claw.
 Installation
Connecting the Decoupler
The decoupler has two cables: one for the servo motor and one for the sensor:
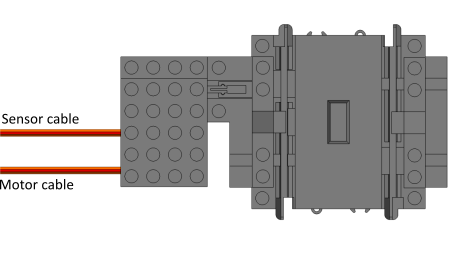 To connect the decoupler:
Configuring the Decoupler
Use a Decoupler tile in nControl to control your decoupler.
Note that the decoupler requires nControl 2019.0 or newer.
 Select the controller and port to which the motor is connected. Do the same for the sensor if you want to use it. The use of the sensor is optional, if you don't want to use it select Train_Sensor_Dummy as controller for the sensor. Positioning the train on the decoupler can be tricky as LEGO® trains are not designed for precise positioning. Check the Show auto-positioning controls box to add buttons to have nControl position the train for you. The use of this feature requires that the trains are equiped with 4DBrix™ WiFi train controllers. Integration in your Layout
The track of the decoupler is 8 studs long; that's half of a standard straight LEGO® track.
So you might need one of our half straight tracks to fit the decoupler into your layout.
Operating the Decoupler
Decoupling Cars
To decoupler train cars:
Auto-positioning the Train
If your train is equiped with a 4DBrix™ WiFi train controller nControl can position the train on the decoupler for you.
It will use the sensor feedback to position the closest coupling right on top of the decoupler. The auto-positioning uses new controller commands that send short powert bursts to the train motor. This feasture requires firmware version 2019.4.1 or newer.
You can update the firmware of the train controller in nControl: choose Controller > Update Controller Firmware and follow the instructions.
To auto-position your train:
Mechanical Safety
You should avoid closing the decoupler when the train wheels are in the way because they will block the movement of the decoupling claw and stain the decoupler.
The decoupler has a mechanical safety to make sure it's not damaged when the train wheels block the claw.
However, try to make sure nothing is blocking the claw before closing it; the decoupoler has an integrated sensor to help you with that.
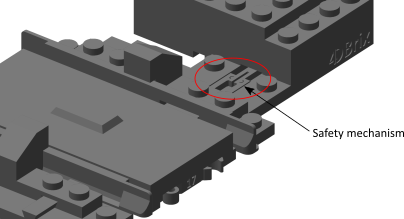 If the claw was blocked when you closed the decoupler you will have the 'reset' the safety mechanism. When the safety mechanism was used it will look like shown below:  Start by removing whatever blocked the decoupler. Then, open the decoupler by clicking on the decoupler tile in nControl. The motor will pull the inner part of the safety back and the mechansim should now look like this: 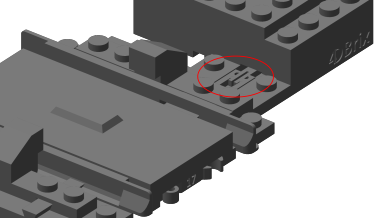 Finally close the claw with your hands until the safety mechanism snaps back into place. Make sure you push on both parts of the claw when closing it. The safety has been reset properly when it looks like shown below: 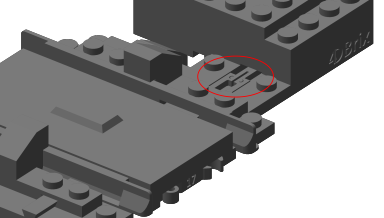 |