Reference > Brix for Arduino
|
2.02.001 - Track Switch Motor, Right
Description
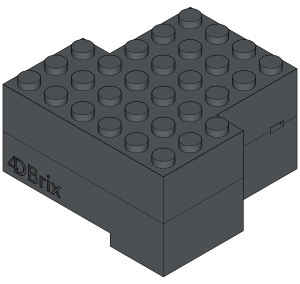
Brick 2.02.001 is a servo motor that can be mounted onto LEGO® 9V and RC/PF track switches. It's intended to be used on right-turn switches but it can be used on left-turn switches as well.
The motor can be identified by the embossed 'R' on the bottom surface.
Specifications
Pinout
The track switch motor has a cable with a 3 pin connector:

Operation
When the motor is mounted on a right-turn switch use the following angles to control the track switch:
Never actuate the motor with angles lower than 25° or higher than 105°.
This would cause excessive stain on the internal mechanism and could damage the track switch motor!
If you mount the motor on a left-turn switch, inverse the angles:
Always shut the motor down after switching the track. Keeping the power on might overheat and damage the motor.
On the Arduino platform, this can be done with the .detach() function. The examples below show how to do this. Example - Wiring
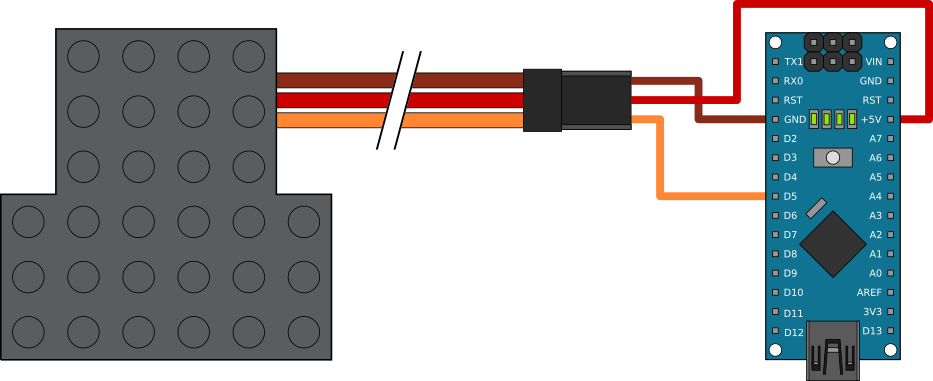
This is a wiring diagram using an Arduino Nano type board.
Basic Example - Code
The following Arduino code actives the switch motor, flips the track switch 10 times with 1s intervals and then shuts the motor down.
//--------------------------------------------------------------------------------------------------
// demo-2-02-001a.ino
//
// Description: Basic demo to control a 4DBrix 2.02.001 track switch motor.
//
// Author: Lowa
// Created: 18-Dec-2016
// Copyright (C) 2016, 4DBrix LLC.  All rights reserved.
//
// Please feel free to use this example for personal, non-commercial use only, provided you keep the
// copyright message intact.  Have fun !
//--------------------------------------------------------------------------------------------------


//--------------------------------------------------------------------------------------------------
// Included libraries
//--------------------------------------------------------------------------------------------------
#include <Servo.h>


//--------------------------------------------------------------------------------------------------
// Global variables
//--------------------------------------------------------------------------------------------------
Servo servo;                                  // Object to interface with servo 1
int servoPin;                                 // The control pin for servo 1


//--------------------------------------------------------------------------------------------------
// Initialization process
//--------------------------------------------------------------------------------------------------
void setup() {

  // Start the serial communication
  Serial.begin(9600);                         // Use the default Arduino baud rate

  // Configure the servo motor
  servoPin = 5;                               // Digital pin 5 will be used for the servo signal
  pinMode(servoPin, OUTPUT);                  // Define pin 5 as output pin
  servo.attach(servoPin);                     // Activate the servo

  // Flip the switch 10 times
  for (int i = 0 ; i < 5 ; i++) {

    // Move the switch to the 'straight' position
    servo.write(105);                         // Move the servo to the 105 degree position
    Serial.println("Straight");               // Print feedback in the serial monitor

    // Wait 1 second
    delay(1000);

    // Move the switch to the 'turn' position
    servo.write(25);                          // Move the servo to the 25 degree position
    Serial.println("Turn");                   // Print feedback in the serial monitor

    // Wait 1 second
    delay(1000);
  }

  // Deactivate the servo
  servo.detach();

}


//--------------------------------------------------------------------------------------------------
// Processing loop
//--------------------------------------------------------------------------------------------------
void loop() {
}


//--- End-of-File-----------------------------------------------------------------------------------
Advanced Example - Code
The code of the basic example does not power the motor down in between switch operations.
This might result in a buzzing sound: due to internal friction the motor might stop just before reaching the requested position.
As they keep on trying to reach that position, this will result in a buzzing noise.
This is not harmful to the motors as long as the duration is limited so the motors don't heat up.
However, prolonged stalling of the motors can cause them to overheat and eventually die so make sure to power your motor down after switching.
The example below will power the motor down in between switch operations. It will also turn the motor slightly back after switching. This helps to ensure the motor reaches the required position and eliminates / reduces the chance of buzzing.
//--------------------------------------------------------------------------------------------------
// demo-2-02-001b.ino
//
// Description: Advanced demo to control a 4DBrix 2.02.001 track switch motor.
//
// Author: Lowa
// Created: 25-Nov-2018
// Copyright (C) 2018, 4DBrix LLC.  All rights reserved.
//
// Please feel free to use this example for personal, non-commercial use only, provided you keep the
// copyright message intact.  Have fun !
//--------------------------------------------------------------------------------------------------


//--------------------------------------------------------------------------------------------------
// Included libraries
//--------------------------------------------------------------------------------------------------
#include <Servo.h>


//--------------------------------------------------------------------------------------------------
// Global variables
//--------------------------------------------------------------------------------------------------
Servo servo;                                  // Object to interface with servo 1
int servoPin;                                 // The control pin for servo 1


//--------------------------------------------------------------------------------------------------
// Initialization process
//--------------------------------------------------------------------------------------------------
void setup() {

  // Start the serial communication
  Serial.begin(9600);                         // Use the default Arduino baud rate

  // Configure the servo motor
  servoPin = 5;                               // Digital pin 5 will be used for the servo signal
  pinMode(servoPin, OUTPUT);                  // Define pin 5 as output pin

  // Flip the switch 10 times
  for (int i = 0 ; i < 5 ; i++) {

    // Move the switch to the 'straight' position
    Serial.println("Straight");               // Print feedback in the serial monitor
    servo.attach(servoPin);                   // Activate the servo
    servo.write(105);                         // Move the servo to the 105 degree position
    delay(400);                               // Wait for 400ms so the motor can move to it's position
    servo.write(102);                         // Move the motor 3 degree back to avoid buzzing
    delay(50);                                // Wait for 50ms so the motor can execute the command
    servo.detach();                           // Deactivate the servo

    // Wait 2 second
    delay(2000);

    // Move the switch to the 'turn' position
    Serial.println("Turn");                   // Print feedback in the serial monitor
    servo.attach(servoPin);                   // Activate the servo
    servo.write(25);                          // Move the servo to the 25 degree position
    delay(400);                               // Wait for 400ms so the motor can move to it's position
    servo.write(28);                          // Move the motor 3 degree back to avoid buzzing
    delay(50);                                // Wait for 50ms so the motor can execute the command
    servo.detach();                           // Deactivate the servo

    // Wait 2 second
    delay(2000);
  }

  Serial.println("Done.");

}


//--------------------------------------------------------------------------------------------------
// Processing loop
//--------------------------------------------------------------------------------------------------
void loop() {
}


//--- End-of-File-----------------------------------------------------------------------------------
|